What You Need to Do
![]() For this first work with your group in Teams, say hello, and add your information to the contact info form, and get to know one another.
For this first work with your group in Teams, say hello, and add your information to the contact info form, and get to know one another.
How This Activity Connects to the Course
You will collaborate on three Major Projects as well as many Weekly Activities in this course. Connecting with your group is crucial to doing well on these projects. The basic goal for this activity is (1) to make sure you know how to connect to Teams, and (2) to post contact info so you and your group can connect easily.
Instructions
These instructions assume you have no experience with Teams. Skip ahead if you already know how to accomplish basic things. Consult the documentation links in the Teamwork & Collaboration Guide or contact 4Help if you need additional support for the tool.
- Find the name of your group on the Fall 2024 Groups PDF.
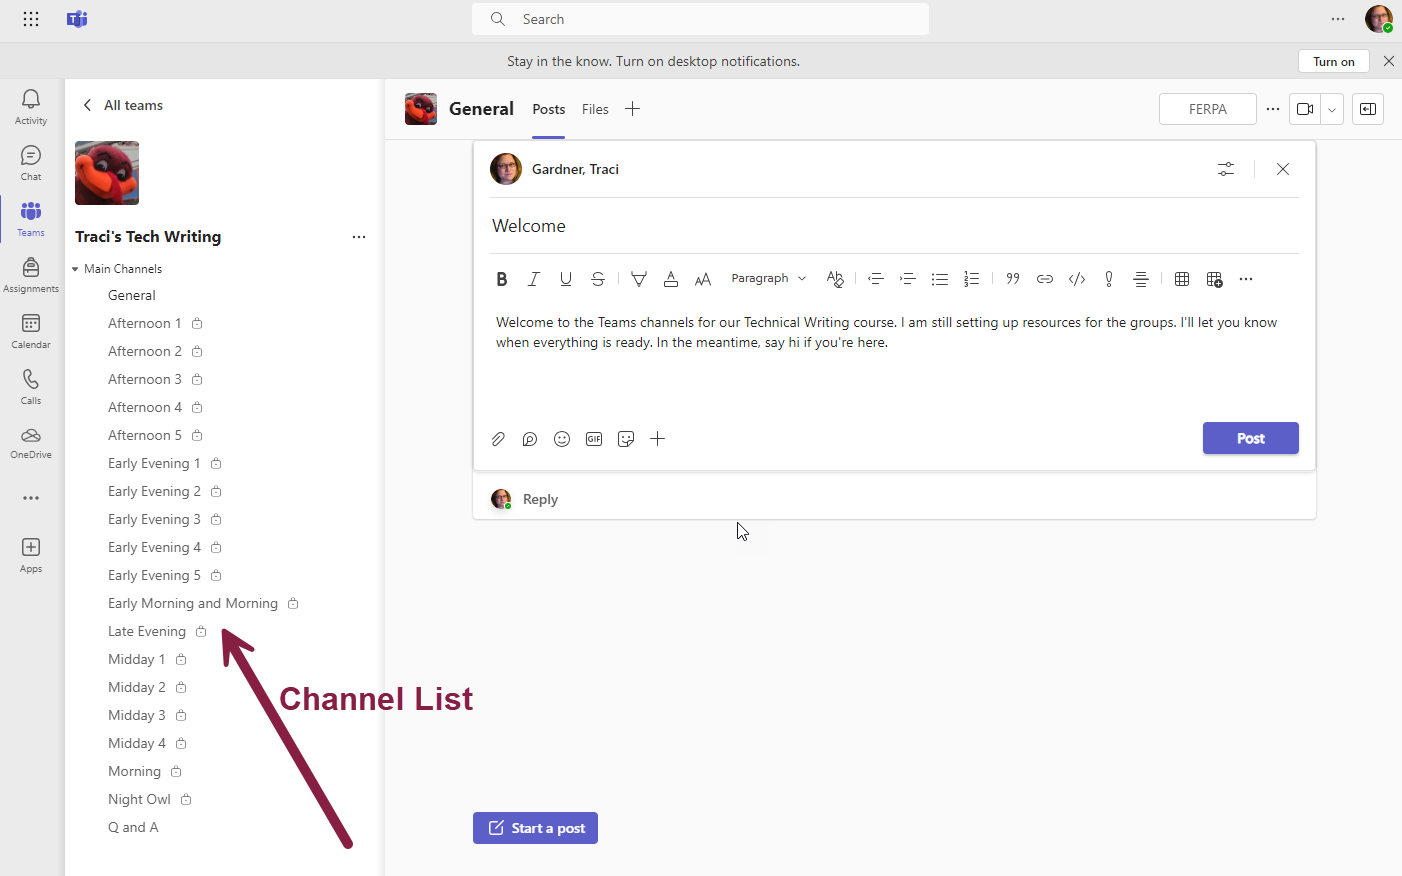
- Go to the Team for our course: Traci’s Tech Writing, F24. You can use the web app or download the desktop app. You log in just as you log into Office365. You’ll see a screen similar to the one in the screenshot below:

- Click on the private channel for your group in the Channel list on the left side of the screen (shown by the maroon arrow in the image above).
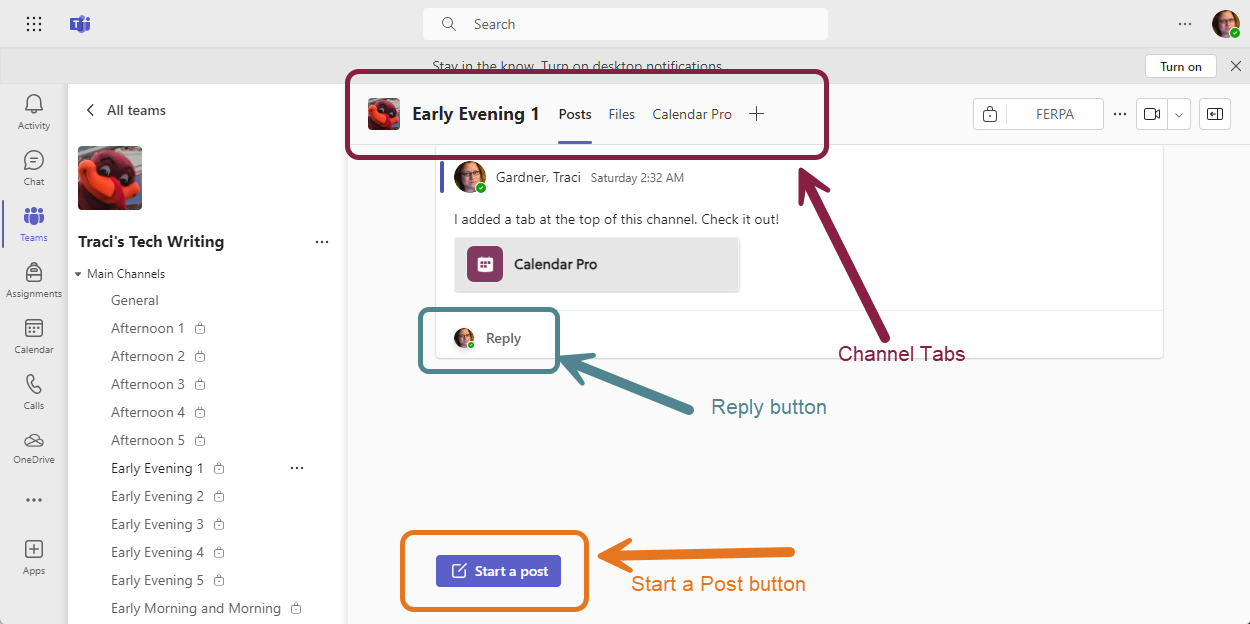
NOTE: Your private channel is named with the current name of your group (See the list in Step 1, above). - Click the Start a Post button (shown by the orange arrow in the image below), and add a greeting message to the rest of your group for your first post. Share you’d like your group to know.

NOTE: If another group member has already posted, you can also click on the Reply button (marked by the blue arrow in the image above) to respond to their comments for an alternative first post. - Connect with other group members by replying to their posts for additional posts.
- Add your contact information to the Contact-Info-Form by following these steps:
- Click on the Files tab, above the channel messages (shown by the maroon arrow in the image above).
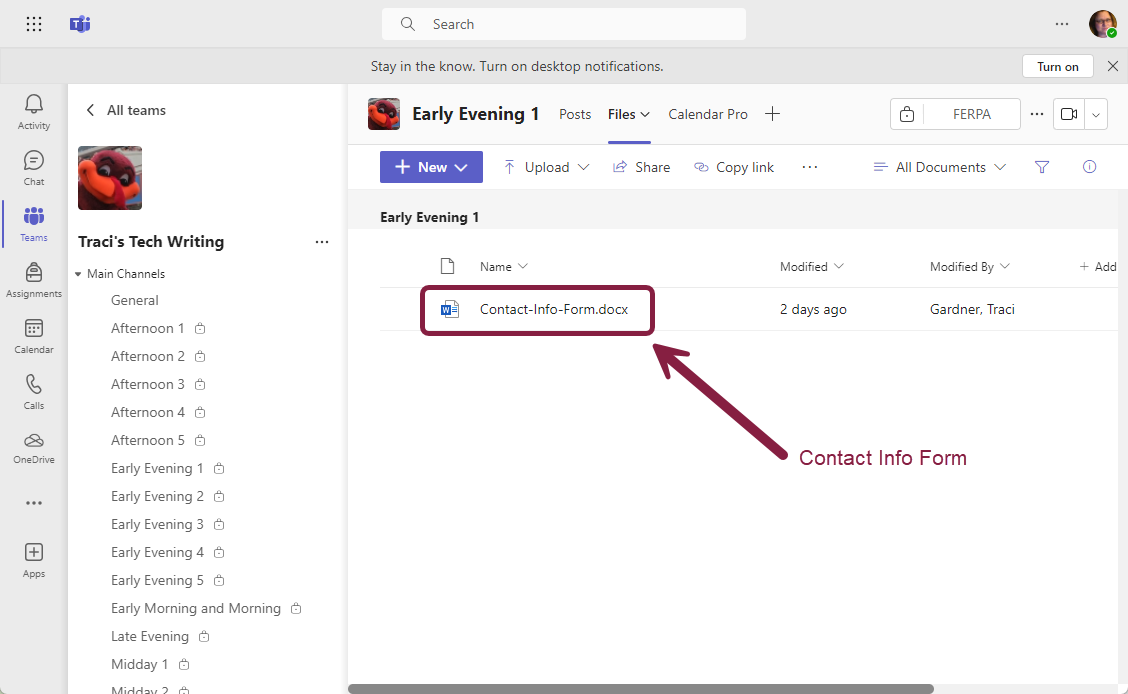
- Click on the Contact-Info-Form.docx file in the file list (marked by the maroon arrow in the image below).

- Follow the instructions in the contact info form to add your details to the group list.
NOTE: If your information changes during the term, be sure to return to this form and update it. - Close the form tab when you are done adding your information. The form saves automatically.
- Explore Teams more if you’d like. Otherwise, close the Teams tab as well.
- Fill in the true/false quiz below to claim a Complete for this activity in Canvas.
Assessment
Canvas automatically marks your work when you answer the questions below. There are three required tasks for this activity:
- A greeting post in your private channel in Teams.
- A reply to at least one other group member in your private channel in Teams.
- Contact information added to the contact-info-form.docx file in your private channel in Teams.
If I find that you did not complete all three of these tasks, I will remove the Complete mark. If the grace period has not ended, you can revise.